Estate - A Property Real Estate App Template
Documentation version 2.0
- Item Name : Estate - A Property Real Estate App Template
- Item Version : Version 2.0
- Author by : NeuronDigital
- Email : melvin@neurondigital.com
Getting Started #back to top
This documentation will help you familiarise yourself with the 'Estate' Android App and the web based Admin page. It is suggested that you first upload the admin page to your server and make sure it is working before continuing to the Android App. The Android App will work fine using the demo server, however it is required to setup firebase for it to work well without errors. The setup of Firebase is explained in the Admin Page Video Tutorial.
Setting up the admin Page #back to top
Before You Start
- 1. Make sure your server supports PHP 5.5 or above and MySQL.
Uploading To Server
-
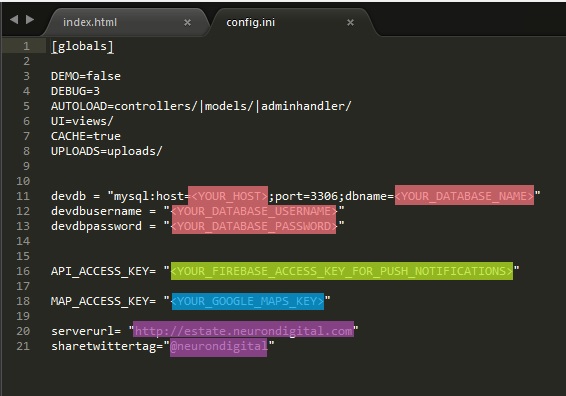
Step 1 - Put your database details (Host, database name, user name, and password) in config.ini. The fields are marked with red below. Also, replace the 'serverurl' with your server url and the 'sharetwittertag' with your twitter tag (used for sharing).
-
Step 2 - Upload the contents of the 'Server Side Code' to your server. Make sure you don't forget the .htaccess.
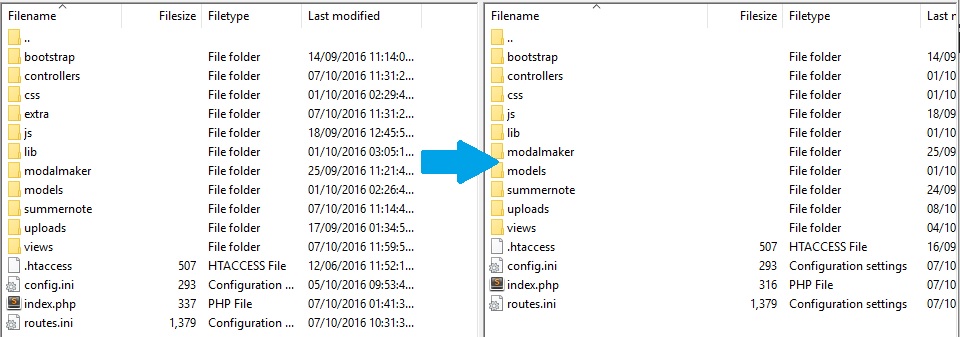
- Step 3 - Create a new MySQL database and import 'Estate_database_v1.sql'.
-
Step 4 - Access the /index.php file that you just uploaded to your server, using your browser. The default login credentials are:
										Username: admin
										Password: pass
Setting Firebase Push Notifications
-
Step 1 - Go to your Firebase Console, go to settings->cloud messaging and get your server key (API_ACCESS_KEY). Put this in config.ini. The field is marked with green above.

Setting Google Maps API Key
-
Step 1 - Go to the Google Maps API Key console, and use it to generate a Map API key (MAP_ACCESS_KEY). Put this in config.ini. The field is marked with blue above.
- Step 2 - Admin Page Done!
Setting up the Android App#back to top
Before You Start
-
Make sure your have Android Studio 2.2 installed and in the Android SDK Manager make sure you have the following installed:
- Build tools v24.0.3
- Google play-services v10.2.0
- Android SDK Tools 25.2.2
- Android SDK Platform-Tools 24.0.3
- Google USB Driver
- Android API 25 SDK
Try to place the project file as close to root (C:/) as possible as windows has a path character limit of 240chars. So, if you get the error:"Failed to crunch file...", reduce the path length.
Importing and running
-
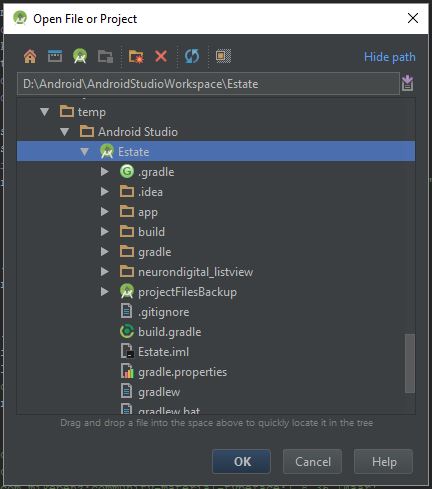
Step 1 - Open up Android Studio and click 'open an existing Android Studio project'.

-
Step 2 - Drag and drop the 'Estate' folder in the dialog to go quickly to the folder.
-
Step 3 - Make sure 'Estate' is highlighted and click 'ok'.
-
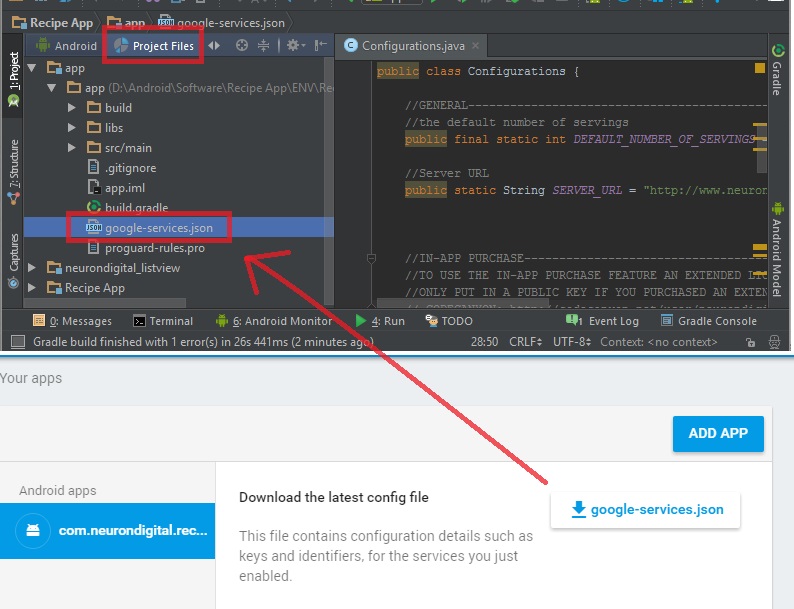
Step 4 - Go to your Firebase Console and download the 'google-services.json' file and replace the placeholder in app/google-services.json. This step is included in the Admin Page video - If you skip this step you will encounter an error during compile time.
-
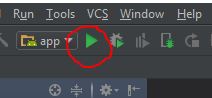
Step 5 - Press the Play button to test the app on the emulator or connect your phone via usb to your computer to try it on your phone.
Changing Package name
This step must be done else you will have problems uploading to Google play and the Rate feature will not work.
-
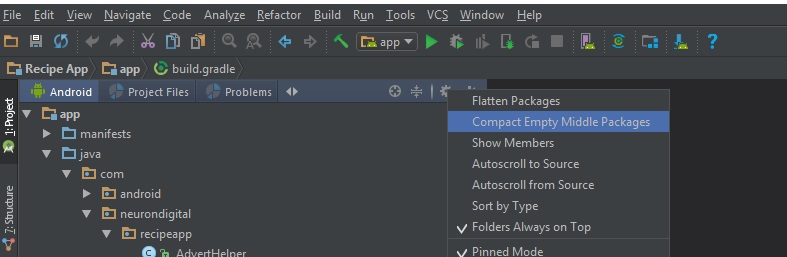
Step 1 - Make sure the 'Compact Empty Middle Packages' option is deselected as shown below.
-
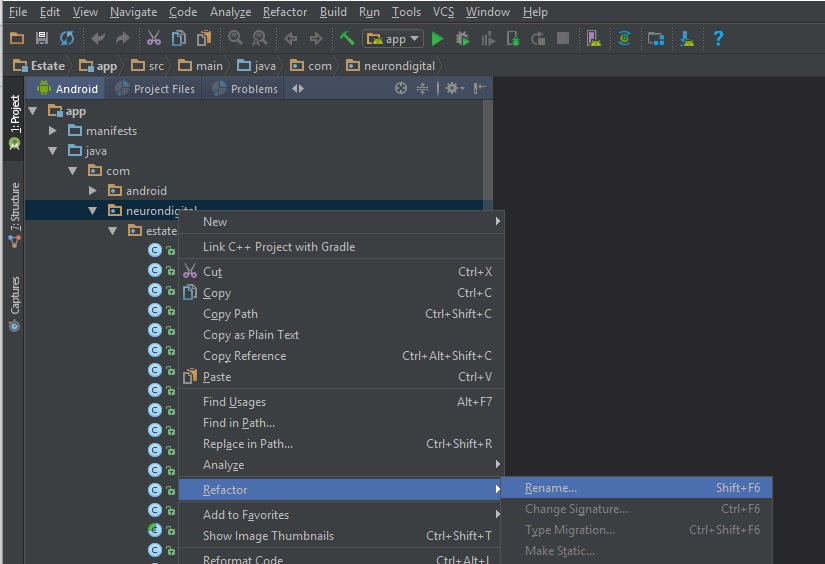
Step 2 - Rename the package id by right clicking on 'neurondigital' and selecting 'refactor' and 'rename' as shown below.
-
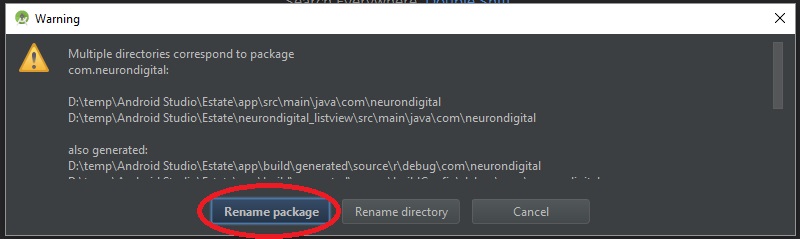
Step 3 - Click Rename package.
-
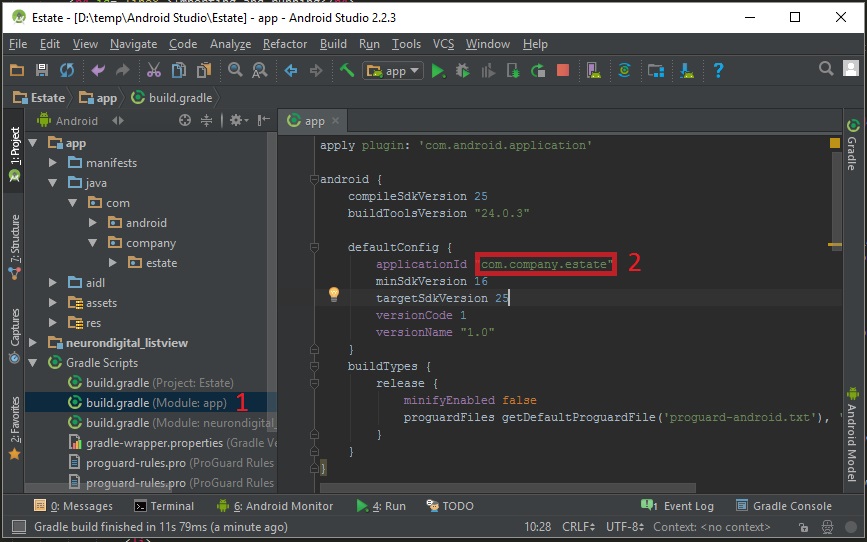
Step 4 - In the popup menu type in your company name. Then press 'refactor' and in the next popup window press 'Do Refactor'. Do the same for 'estate'. The package name should be in this format: com.yourcompany.AppName

-
Step 5 - Open app/build.gradle and put in the same package id as before instead of the 'com.neurondigital.estate'. This is shown below.
App Customisation
-
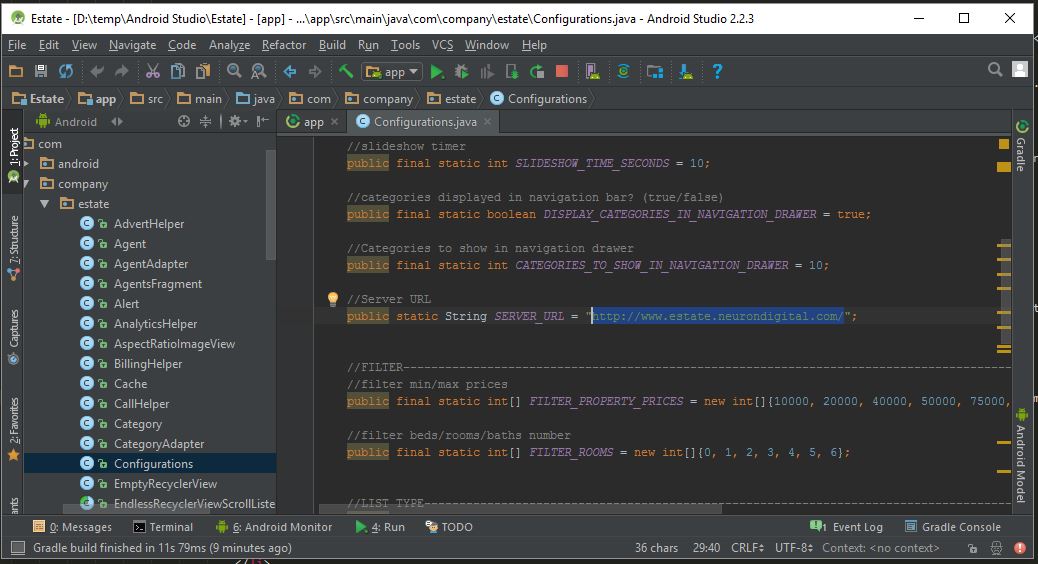
Step 1 - Put in your Server url in Configurations.java
-
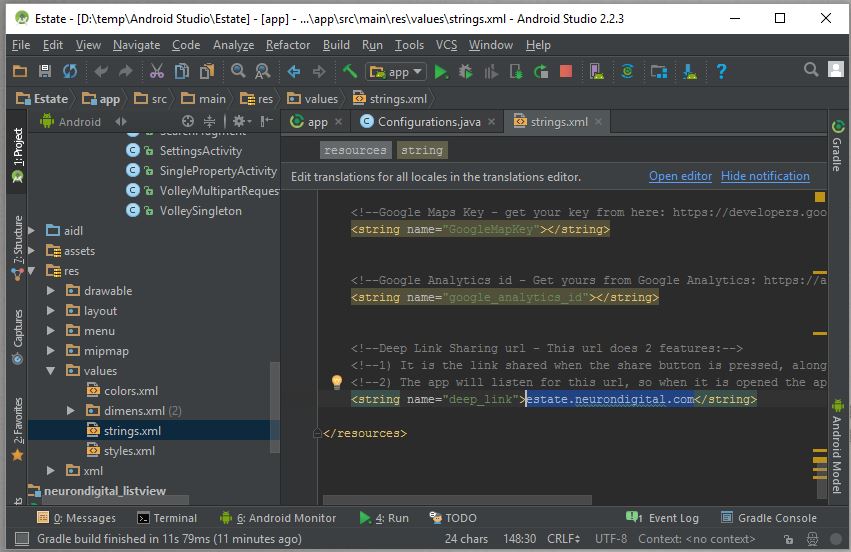
Step 2 - Replace the share deep link url in res/strings.xml. When the user opens a url that matches the url you specified here, it would be opened up in the estate app. If the app is not installed, the url would be opened on the browser, so make sure to choose a domain owned by you and has the server on it. eg: http://estate.neurondigital.com/1
Replace icon and Images
-
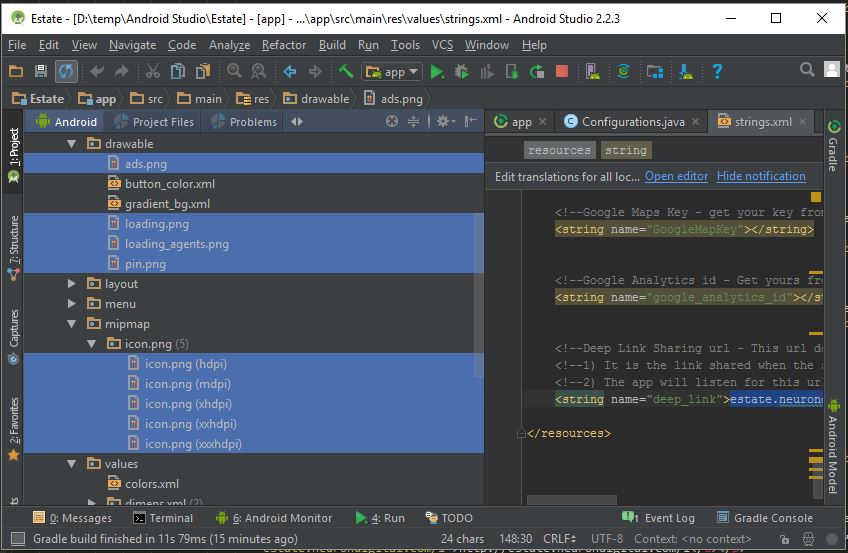
The images can be found under app/res/drawable. To replace the images just copy/paste the image in the drawable folder to replace the other.
-
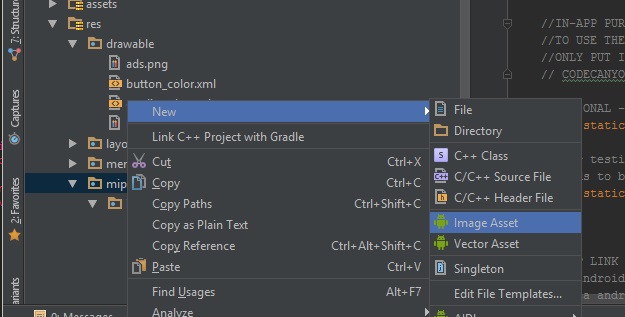
The icons can be found in app/res/mipmap. Notice that there are different sizes. To replace the icons just right-click->new->Image Asset and select your image.
Add AdMob interstitial Ads (optional)
-
Create an interstitial Ad on AdMob and paste the AD unit Id in the strings.xml file. The Ad displays when the user clicks a property in the home screen. Make sure to add this to start making money from your App. The display rate can be changed from strings.xml from the ad_shows_every_X_clicks parameter.
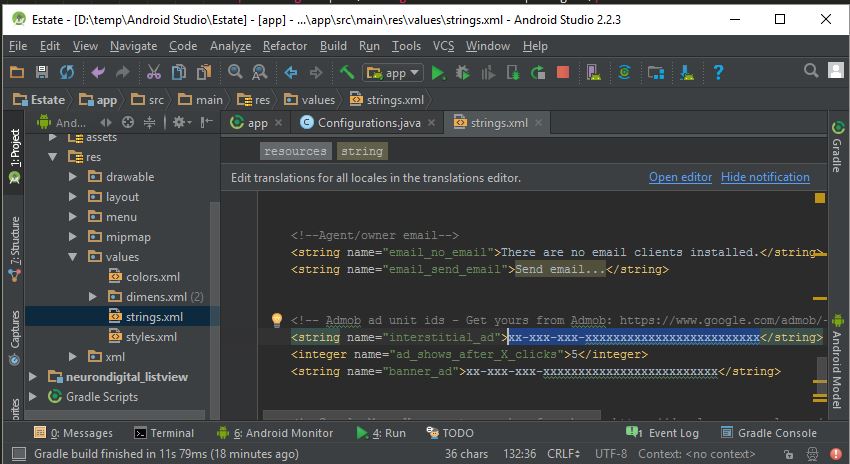
Add AdMob Banner Ads (optional)
-
Like the interstitial Ad, create a Banner Ad on AdMob and paste the AD unit Id in the strings.xml file. The Ad displays in the bottom of the screen. Ideally to not annoy the user, it's either the banner or the interstitial ad, so you may wish to leave one of the Ad IDs in strings.xml empty.
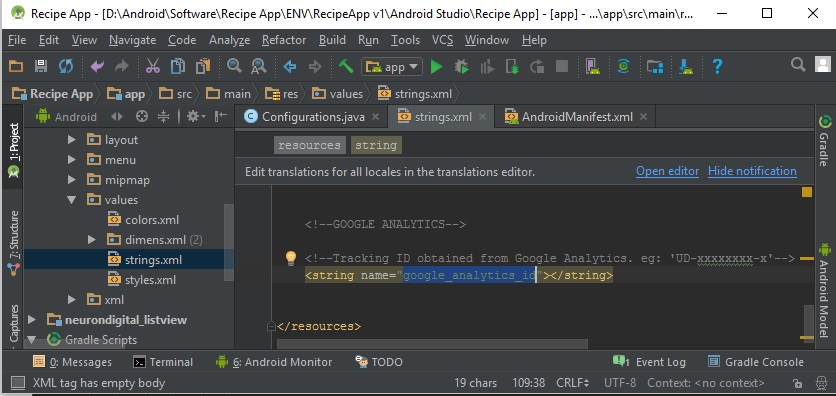
Google Analytics (optional)
-
Google Analytics where removed from the template in version 2 because it is now deprecated by Goolge. Use firebase analytics instead.
Google Maps API Key
-
Go to the Google Maps API Key console, and use it to generate a Map API key. This is the same key used in the server. Put this in strings.xml in the 'GoogleMapKey' field.
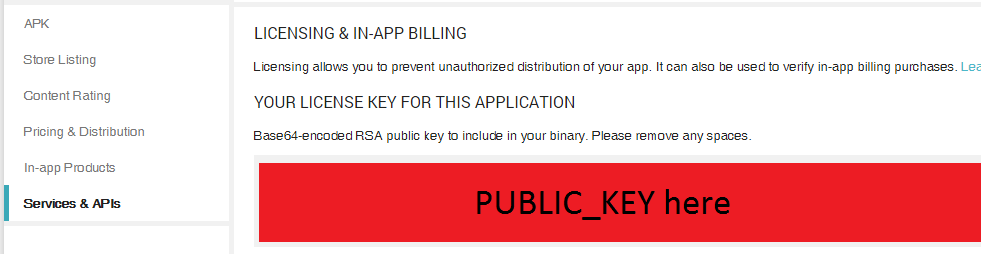
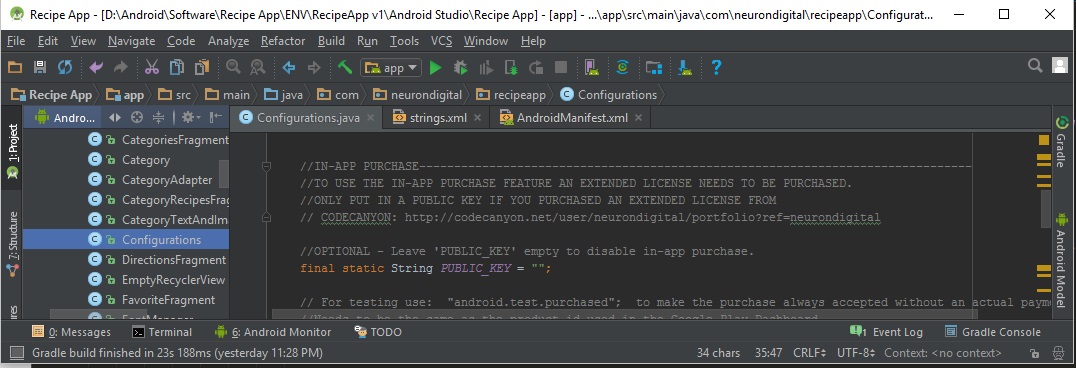
In-App Purchase
To use this feature you need to purchase an 'Extended License' of the template from CodeCanyon. This feature is not covered in the 'Regular License.'
-
Step 1 - The template allows for the user to purchase a premium upgrade to remove ads using google Play In-app Payments. Before doing so, create your app in Google Play Dashboard and locate the 'Public Key' as it can seen below:
-
Step 2 - Then add a new in-app product and give it a Product id.
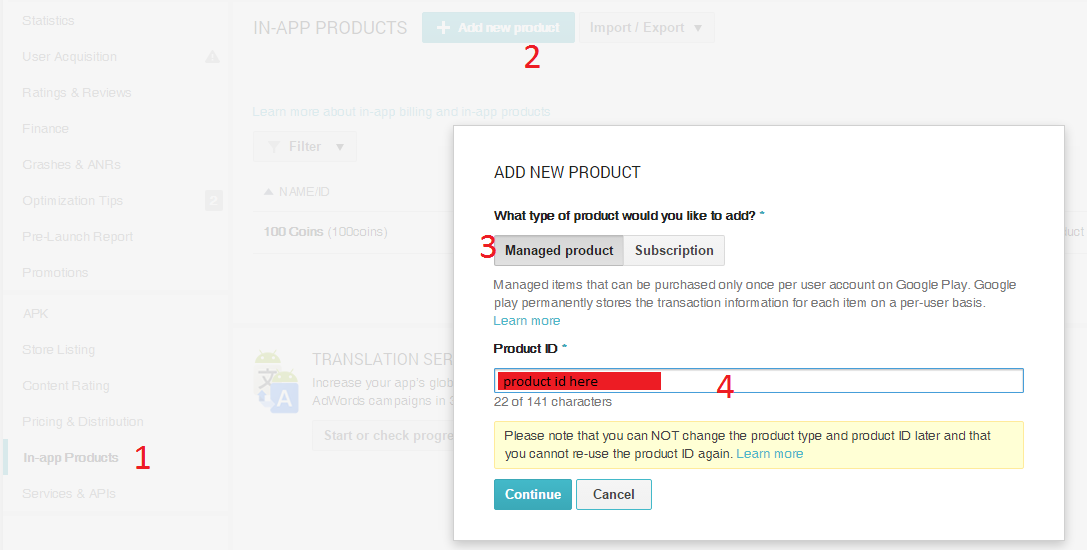
-
Step 3 - Finally, put your Public Key and product id in configuration.java:
Translation
-
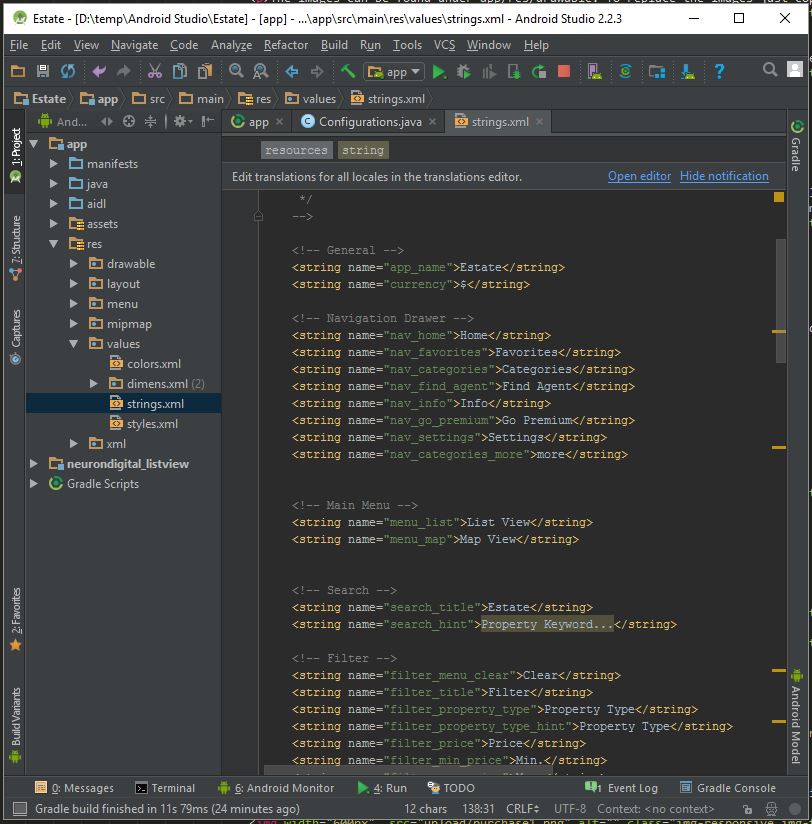
All translatable text is contained within the strings.xml file.
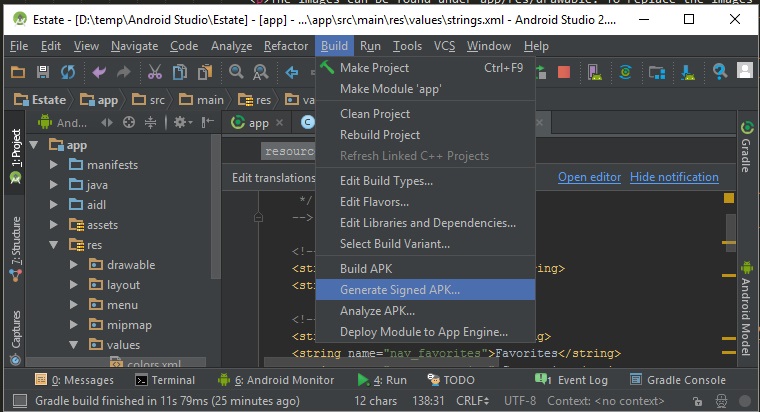
Export your App as a .APK for Google Play
-
Go to Build| Generate Signed APK... and export the .APK file.
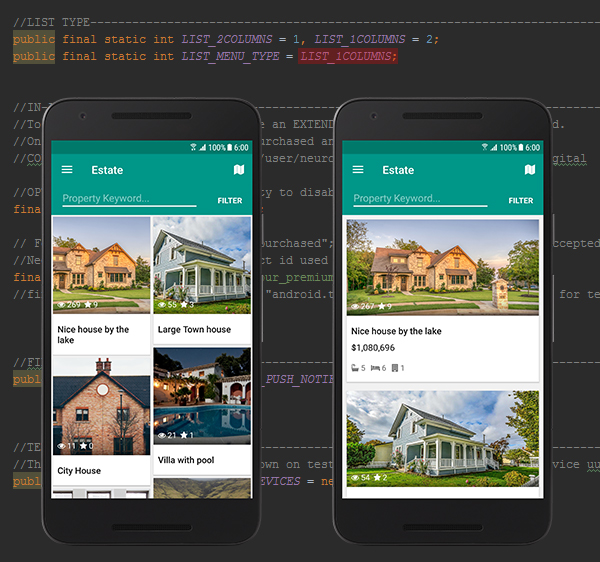
Grid View or Card View
-
Go to Configurations.java. Replace the LIST_1COLUMNS in the second line displayed below, with LIST_2COLUMNS if you wish to use grid view.
Support Desk #back to top
If you need any support,
- First check the FAQ questions of the item on codecanyon.
- If you don't find anything there check the item comments section.
- If you still don't find your answer it would be best to ask your question in the comments section for others to see.
- For private support, please send me a message via my Codecanyon page.
- * Responding to questions or problems regarding the item and its features
- * Fixing bugs and reported issues
- * Providing updates to ensure compatibility with new software versions
- * Customization and installation services
- * Support for third party software and plug-ins
- * Make sure your question is a valid Theme Issue and not a customization request.
- * Make sure you have read through the documentation and any related video guides before asking support on how to accomplish a task.
- * Make sure to double check the template FAQs.
- * If you have customized the template and now have an issue, back-track to make sure you didn't make a mistake. If you have made changes and can't find the issue, please provide us with your changelog.
Version History (Changelog) #back to top
						-----------------------------------------------------------------------------------------
						Version 1 - Feb 2nd, 2017
						-----------------------------------------------------------------------------------------

						- Initial Upload

                        -----------------------------------------------------------------------------------------
						Version 2 - Jan 7th 2019
						-----------------------------------------------------------------------------------------

                        - Bug Fix: sql database updated to be compatible with latest sql version
                        - removed extra CALL_PHONE permission
                        - Migrated to AndroidX
                        - Updated to API 28
                        - removed Google Analytics. Use Firebase Analytics instead
                        - Fixed issue in build.gradle related to the orger of jCenter() and google()
                        - Now using the latest Admob Ads library with Admob app id.
                        - Server Side: added submission date inputting
                        - Server Side: added default gps coordinates in js/script.js
                        - Server Side: Added support for php 7.2